Securing a GraphQL Server API with ASP.NET Core & Azure AD B2C - Part 2
Configure Azure Active Directory B2C
The Setup
In Part 1 of this blog series, I covered the process of standing up an API using GraphQL, GraphiQL and ASP.NET Core. Now that the API is up and running, I'll show how to secure the API using Azure AD B2C. Future posts will discuss how to get the solution built and deployed to an Azure App Service using Azure DevOps pipelines. Finally, we'll take a look at how to integrate the newly secured API with a React App to customize the user experience.
The series assumes that you know basic GraphQL concepts, and does not cover building queries, mutations, etc except as they relate to or are effected by the particulars of the security implementation. I also assume you know your way around the Azure Portal and Azure DevOps. All series code will be made available on GitHub. I'll be using Visual Studio Code throughout the series, feel free to use the tool of your choice to manage your code.
Part 2 - Configuring Azure Active Directory B2C (Azure AD B2C)
As I mentioned above, part 2 of the series will cover getting the baseline configuration for Azure AD B2C setup and running locally on your development machine. We'll be working almost exclusively within the Azure Portal for this post, so if you don't already have one, setup a free Azure account.
High Level Concepts
To get started, it will be useful to solidify the concepts and vocabulary I'll be using throughout the remainder of the post. This should help you get a picture of the overall solution and understand where Azure AD B2C fits into the architecture. Let's start with a basic diagram:
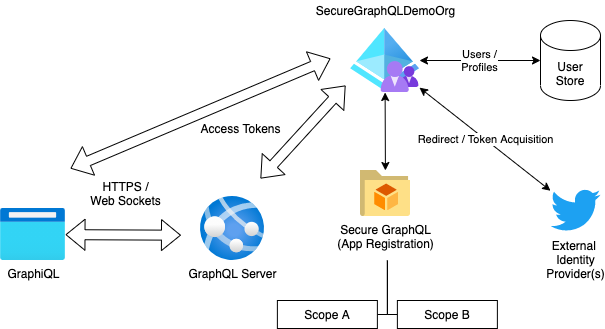 Azure AD B2C Environment
Azure AD B2C provides the 'hub' around which our authentication / authorization solution is configured and executed. The service provides a user / profile store allowing for local user registration, while also providing hooks into external identity providers (IdPs), such as Microsoft, Twitter, Facebook, Google, etc. This provides one point of integration for your application, rather than working to directly integrate with each IdP separately. You can get details on all the Azure AD B2C has to offer by browsing the documentation.
The first pieces of the puzzle are the app registrations. App registrations allow you to define the details about a particular application that will access your Azure AD instance. In our case, we have two applications, one represents the API itself and the other represents our GraphiQL client application. Our API app registration exposes one or more scopes which are used to govern access to resources that our API exposes. The client application registration identifies those scopes as 'requestable'/'consumable' from a client using that registration.
Identity Providers (IdPs) are the second puzzle piece. An IdP provides a method for your users to sign into your application and maintain profile data for your application. During sign-in, the user selects which IdP they would like to use (from the set you have configured), and are then redirected to that IdP to complete the sign-in process. These providers generally (but not always) utilize the OpenID Connect / OAuth2 specifications to manage this interoperability. It will be up to you to configure which IdP(s) you want to enable within your tenant, and I'll show you where that happens as we move through the post.
The third and fourth pieces are the implemented API which is secured, and the client application accessing that API. Our solution will integrate with Azure AD B2C in a couple of ways:
Directly via the user's browser
Redirecting the client browser to the Azure AD sign-in infrastructure allows the client to obtain a sign-in token which is then retained by our API and associated with the user via Cookies. The API can then use this sign-in identity token to obtain a scoped access token on behalf of the client application which is then sent to the GraphiQL interface for use during communciations with the GraphQL API. The GraphQL infrastructure can use this token to authorize access to specific features within the API. We'll get into this portion in more detail in Part 3.
Via the ASP.NET Core Infrastructure
When the GraphiQL client application accesses the API, it provides a JWT Bearer token header which is validated by the API and the contained scopes are used to control access to the API resources. This scope-based access control is similar, but not equivalent, to role based access control provided by other types of authorization.
Azure AD Setup
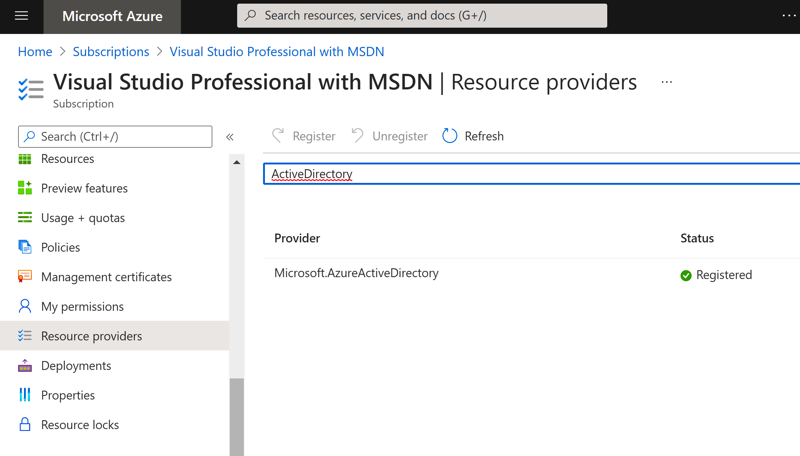
To get started, you will need access to an Azure account. There are free accounts available, and for the purposes of this demo, I'll assume you don't have access to any of the premium features of Azure AD. You'll need to identify which Azure Subscription you want to use to host the Azure AD organization, for this demo, I'm just using my MSDN Professional account. If this is the first time you're using Azure AD with this subscription, you'll want to make sure your subscription has the Microsoft.AzureActiveDirectory resource enabled, you can do that by going to 'Subscriptions' -> '<your chosen subscription>' -> 'Resource Providers'. Once there, search for 'ActiveDirectory' and verify you have the provider registered with your subscription. If not, click 'Register' and wait a few minutes for the registration to complete.
 Azure Portal - Enable Active Directory
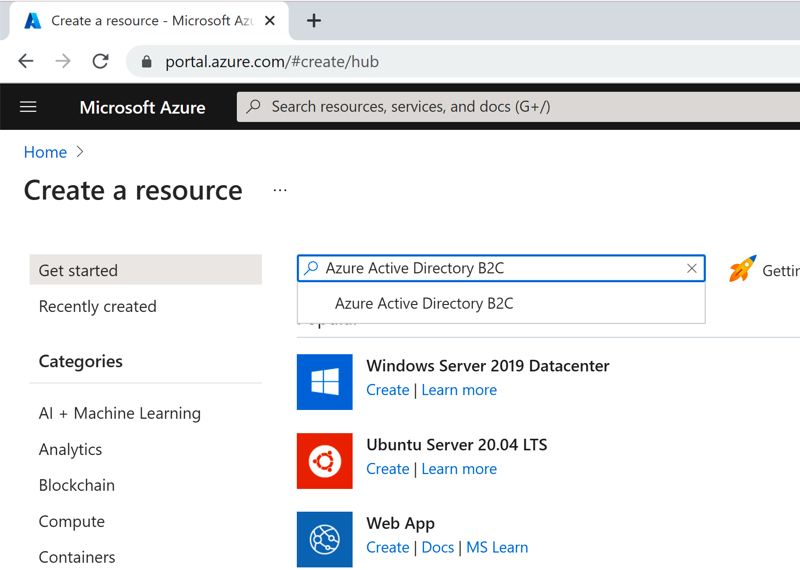
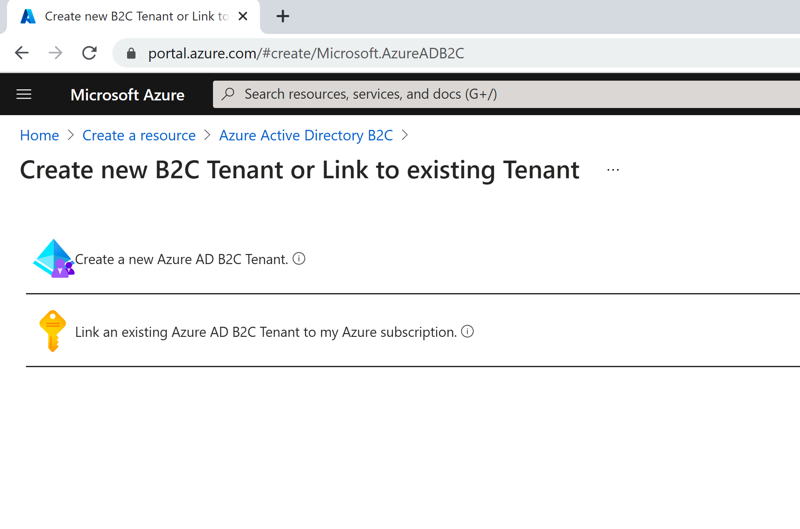
Once you have verified that your subscription has Azure AD registered, you can create the new Azure AD B2C tenant. Go to 'Home' and click 'Create a Resource' to get started, then search for 'Azure Active Directory B2C', select and hit 'Create':
 Azure Portal - Create a Resource
 Azure Portal - Active Directory B2C
The Azure Portal now walks you through getting your organization configured and deployed. In this case, I created a new Resource Group, as future articles will be creating additional Azure services that I'll want to have together for ease of management. Once you've filled out the forms, click through to 'Review & Create', then 'Create' and give Azure a few minutes to get your new instance provisioned.
 Azure Portal - Create new B2C Tenant
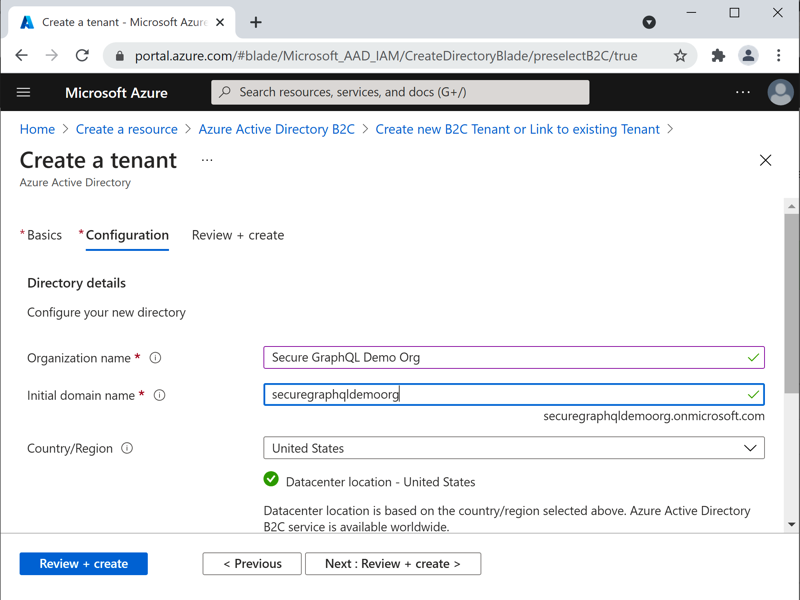 Azure Portal - New B2C Tenant Organization
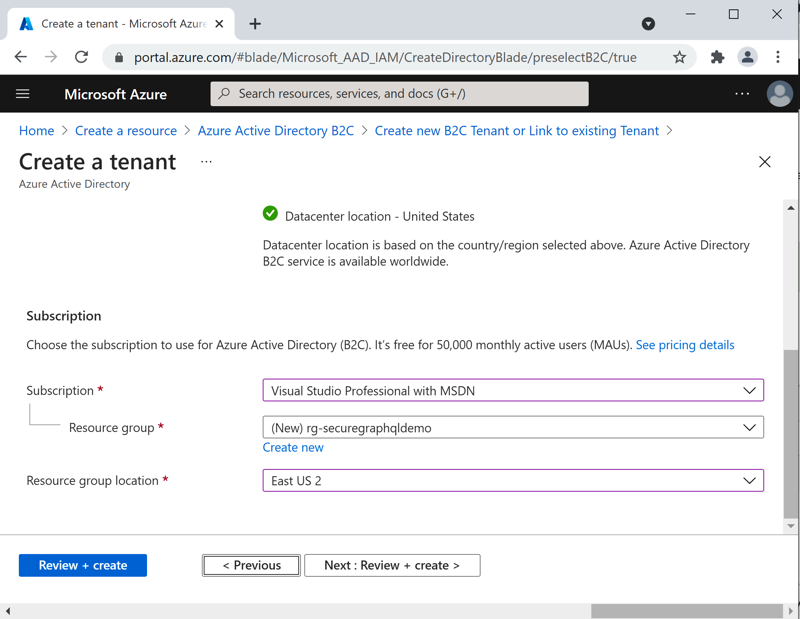 Azure Portal - New B2C Tenant Subscription
Congrats! You now have a new Azure AD B2C tenant ready to go. Let's jump over and get the B2C sign-in processes configured.
Azure B2C Identity Providers
Identity Providers are an integral component of the story. Azure AD B2C provides an out-of-the-box 'Local' IdP to support users registering with your system that do not have, or do not want to use, an existing external identity for your application. External (to your B2C instance) identity providers allow for an alternative means of authentication with your application, through services like Microsoft Accounts, Google, Facebook, Twitter, etc. A full list of identity providers and the specifics of configuring them can be found in the documentation.
Configuring an external identity provider setup is an optional step, and I've setup a couple for this post just to demonstrate how they will become configurable within the user flows area. I'm not going to cover the details on configuring any given identity provider here, the documentation linked above does a great job walking you through the process for whatever provider you're interested in lighting up. One thing I will call out here is the slightly confusing 'dual mode' of managing your new B2C tenant.
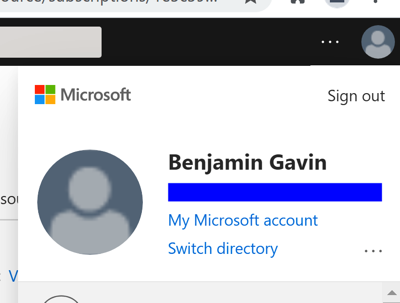
To start configuring your newly created tenant, you'll need to switch to it by clicking your profile picture in the upper right corner of the portal and choosing 'Switch Directory'. Here, I'm switching to the newly created Secure GraphQL Demo Org (securegraphqldemoorg.onmicrosoft.com).
 Azure Portal - Switch Directory
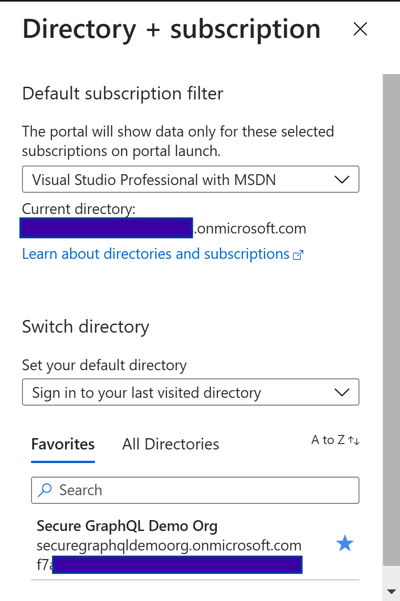 Azure Portal - Switch Directory
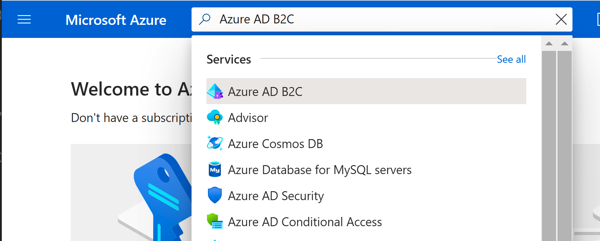
Feel free to click the 'star' to favorite the directory to make selecting it easier in the future. Once selected, you should be dropped back to the 'home' Azure Portal screen, but now in the context of your newly created Azure AD tenant. This is where things get a bit confusing, if you search for (and click) the 'Azure Active Directory' node, you will go into the 'standard' Azure AD maintenance blades. For our purposes here, this is generally not what you want. Instead, search for and select 'Azure AD B2C' which presents a much reduced and B2C focused management experience.
 Azure Portal - Select Azure AD B2C
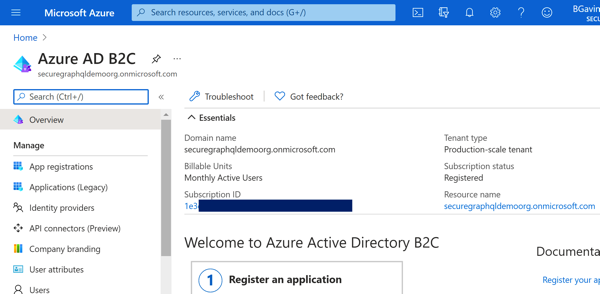 Azure Portal - Azure AD B2C Overview
Clicking on 'Identity Providers' will allow you to configure which IdP(s) are enabled for this tenant. I have configured the 'Local' provider for email/phone/username authentication, and enabled the Twitter and GitHub external providers for this example.
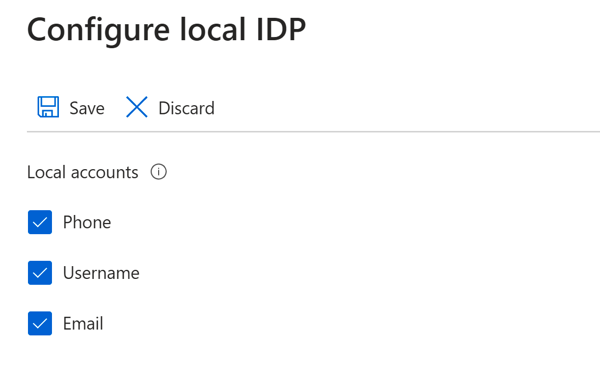 Azure Portal - Local IdP Config
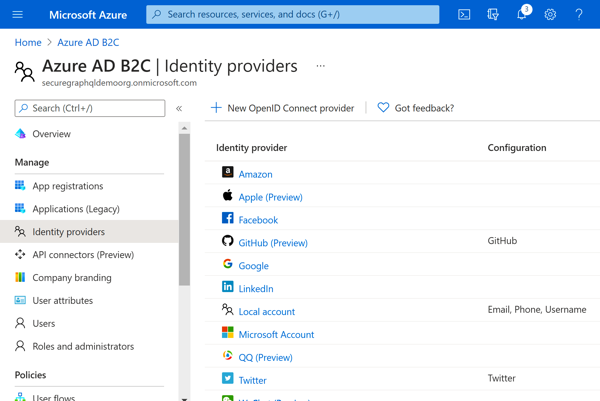 Azure Portal - Enabled Identity Providers
Now that our IdP(s) are enabled, it's time to configure our User Flows.
Azure AD User Flows
User Flows define how your applications users interact with the Azure AD B2C sign-in (and related) processes. There is a lot of customization available here, including support for localization, branding, etc. For now, we're just going to get the basic user flows that we need setup and ready for eventual use by our application(s). If you want to learn more about the options available, you can visit the documentation.
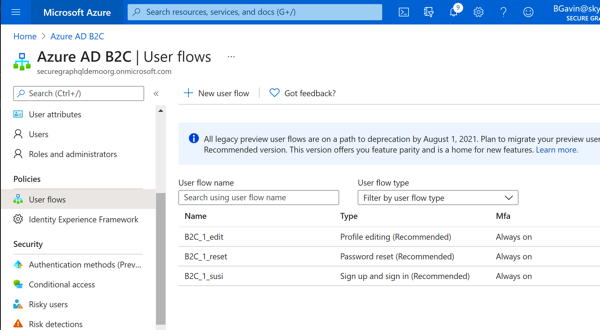
To get started, click the 'User Flows' from the Azure AD B2C overview blade. There are no flows initially defined, so we're going to add the 3 basic flows to support sign-up/sign-in, password reset and profile editing. Go ahead and click 'Add user flow' to add the three basic flows mentioned, and select the identity providers you want added to each flow. For the demo, I just turned on MFA for everyone, but you may want to utilize tools like Conditional Access to meet the specific requirements of your application. Keep in mind, MFA support for 'social' IdP(s) may or may not be supported. The settings I used for each flow are outlined below:
NOTE: Each flow has a 'Recommended' and 'Standard (Legacy)' option, as mentioned on the creation screen(s), stick with the 'Recommended' unless you have a specific need for the legacy functionality. The details of what the two versions mean is available in the documentation, but the short version is that 'Recommended' is the only version that is maintained and will receive new features as they are available, 'Standard' is effectively deprecated at this time (for public cloud users).
- Sign Up / Sign In
- Name: susi
- Local accounts: Phone/Email signup
- Social Providers: Twitter, GitHub
- MFA: SMS/Phone Call, Always On
- Conditional Access: No
- User Attributes (all are selected as collected and returned):
- Country / Region
- Display Name
- Email Address (collect)
- Email Addresses (returned)
- Given Name
- Identity Provider (returned)
- Surname
- User's Object ID (returned)
- Profile Editing
- Name: edit
- Local accounts: Phone/Email signup
- Social Providers: Twitter, GitHub
- MFA: SMS/Phone Call, Always On
- Conditional Access: No
- User Attributes (all are selected as collected and returned):
- Country / Region
- Display Name
- Email Addresses (returned)
- Given Name
- Identity Provider (returned)
- Surname
- User's Object ID (returned)
- Password reset
- Name: reset
- Local accounts: Reset via email address
- MFA: SMS/Phone Call, Always On
- Conditional Access: No
- User Attributes:
- Country / Region
- Display Name
- Email Addresses
- Given Name
- Identity Provider
- Surname
- User's Object ID
Once configured, you can select the user flow and test the flow by clicking the 'Run User Flow' from the 'User Flow' configuration blade. I suggest you do this once you've worked through the next section for each of the flows you've created to make sure that they are configured correctly, especially if you have enabled MFA or external social IdP(s).
 Azure Portal - Configured User Flows
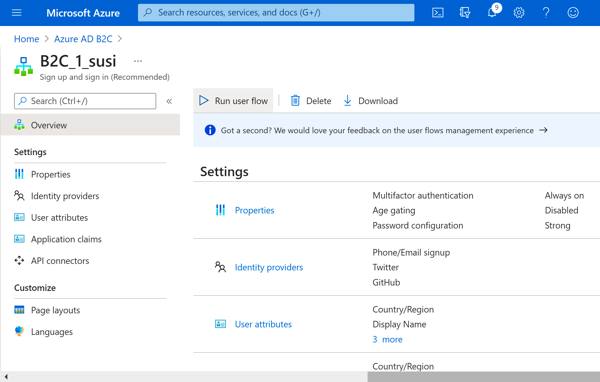 Azure Portal - User Flow Details
Azure B2C Application Registration
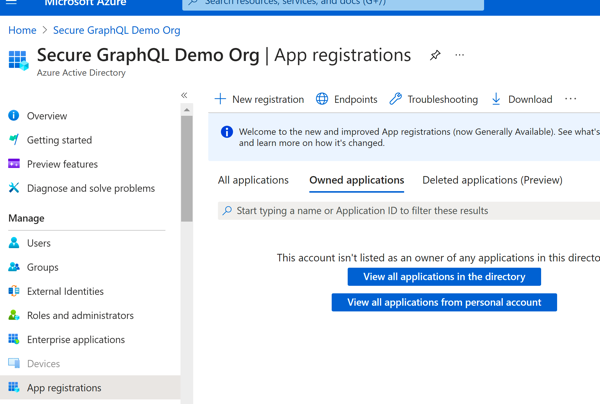
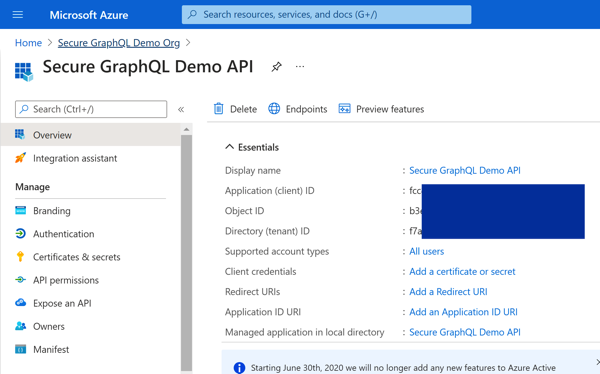
In order to actually leverage Azure AD B2C, you need to register the consuming applications with Active Directory. We'll start by getting the API application registration created, some aspects of the registration will be left for Part 3, but most of the baseline configuration will be ready to use by the end of this post.
Azure Portal - Azure AD B2C OverviewOn the left pane is a list of things you can do with the tenant, and we'll start by adding a new App Registration. Click 'App registrations', then 'New Registration' to get started. Once there, supply the name, make sure the 'Accounts in any identity provider or organizational directory (for authenticating users with user flows)' option is selected and then click 'Register' (the defaults for the other options should be fine for now). Once this processes, you should be dropped to the Overview screen for the new app and we can add a couple resource scopes to be exposed by our API.
 Azure Portal - Create App Registration
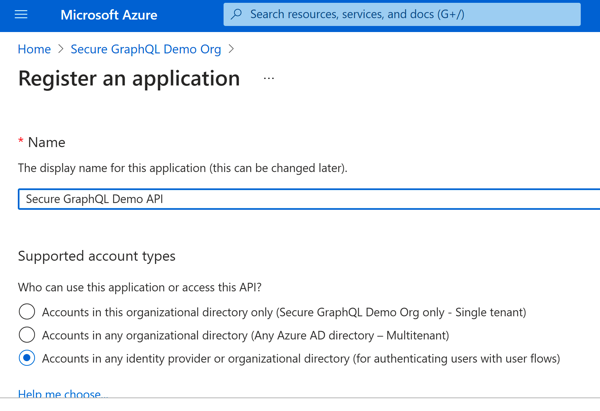 Azure Portal - New App Registration
From the Overview screen on the new App, choose 'Expose an API', then set the 'AppID' URI that represents this particular API within your Azure AD B2C tenant.
 Azure Portal - App Registration Success
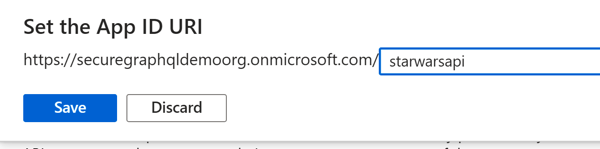 Azure Portal - Set AppID URI
For our application, we're going to setup two scopes, one for 'read' access and one for 'write' access to character data. So go ahead and add two new scopes to represent these two access levels. I've included a screenshot of the 'character:write' scope setup below.
 Azure Portal - Character Write Scope
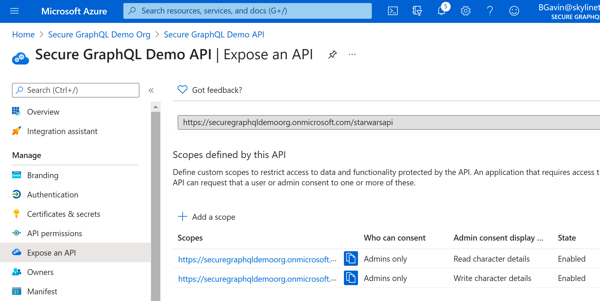 Azure Portal - Scopes Added
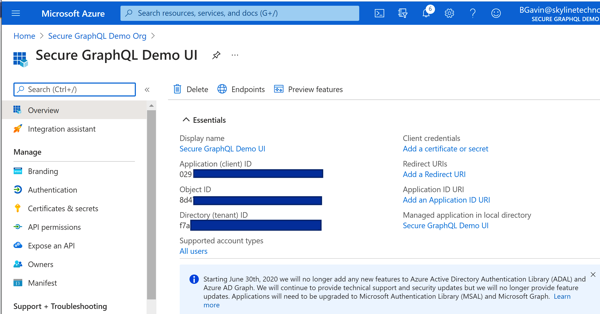
Now, jump back to the B2C tenant and add a second app registration for the GraphiQL UI. During setup for the UI app, setup https://jwt.ms/ as the 'Reply URI' for this application to facilitate testing the flows we created above. Once created, navigate to the 'API Permissions' tab and add permissions to the API scopes you setup earlier to this application.
 Azure Portal - UI App Registration
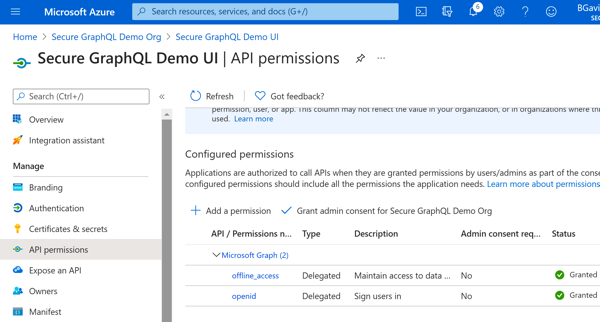 Azure Portal - Add API Permission
 Azure Portal - Select Permission(s)
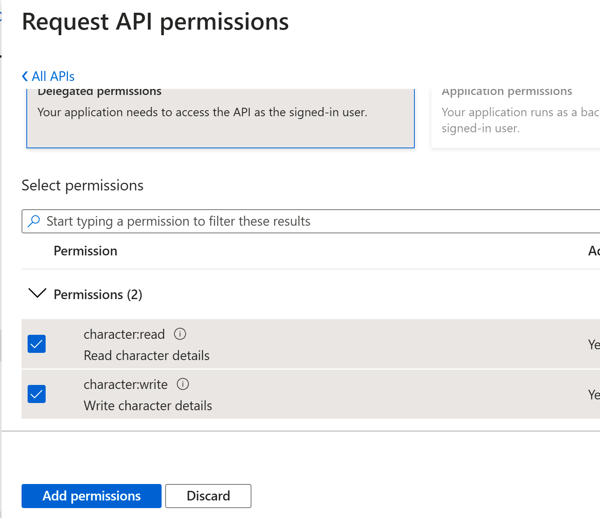 Azure Portal - Select Permission(s)
Wrap Up
Whew... that was a lot to push through for this second installment, we walked through initializing a new Azure AD B2C tenant to facilitate managing the users of our application. We connected with some external Identity Providers so users can leverage their existing identities to use our application, then we setup a set of user flows to guide users through the sign in, profile edit and password reset capabilities. Lastly, we configured the applications we'll use in the next installment when integrating security into our GraphQL API and UI. Speaking of next steps, Part 3 will have us spending time both in Azure Portal and in our solution to close the loop on providing secured access to our API.
- Part 1 - Create the API
- Part 2 - Configuring Azure Active Directory B2C <== You're here!
- Part 3 - Integrating the GraphQL Server API with Azure AD B2C
- Part 4 - Automating Build & Deployment to Azure App Service
- Part 5 - Consuming the Secured GraphQL API from a React App
Until then, happy coding!
P.S. - A note on pricing
One thing that I didn't cover here is pricing, and there's a good reason for that. At the time of this writing, links to pricing for the B2C product lead to the primary Azure AD External Identities pricing, and I'm unsure if the pricing listed on that page is valid for the B2C product or not. Your specific pricing is also governed by your Azure agreements with Microsoft (including Enterprise Agreements). In any case, from what I've been able to determine, the B2C product is free for the first 50,000 monthly active users (users who authenticate at least once with your system within a given month). If you have MFA enabled, it also appears there is a fixed $0.03 USD charge per SMS message sent, but check with your Microsoft representative to get pricing specific to you.
Credits
I want to thank my colleagues at Core BTS for all their assistance in the preparation of this post. Their technical expertise and willingness to share that knowledge is truly inspiring. Specifically, I'd like to thank Andrew Petersen for his technical reviews and feedback.